
How to Upload Levels
So, What’s going on here?
Well, we have been working hard over the last few weeks with the editor, but also with the website.
FreeTheBlobs.com is now a levels archive for uploading and downloading user-created content.
Over the course of this post, we will show you exactly how you can post your own levels, and how you can download them.
Lets get started.
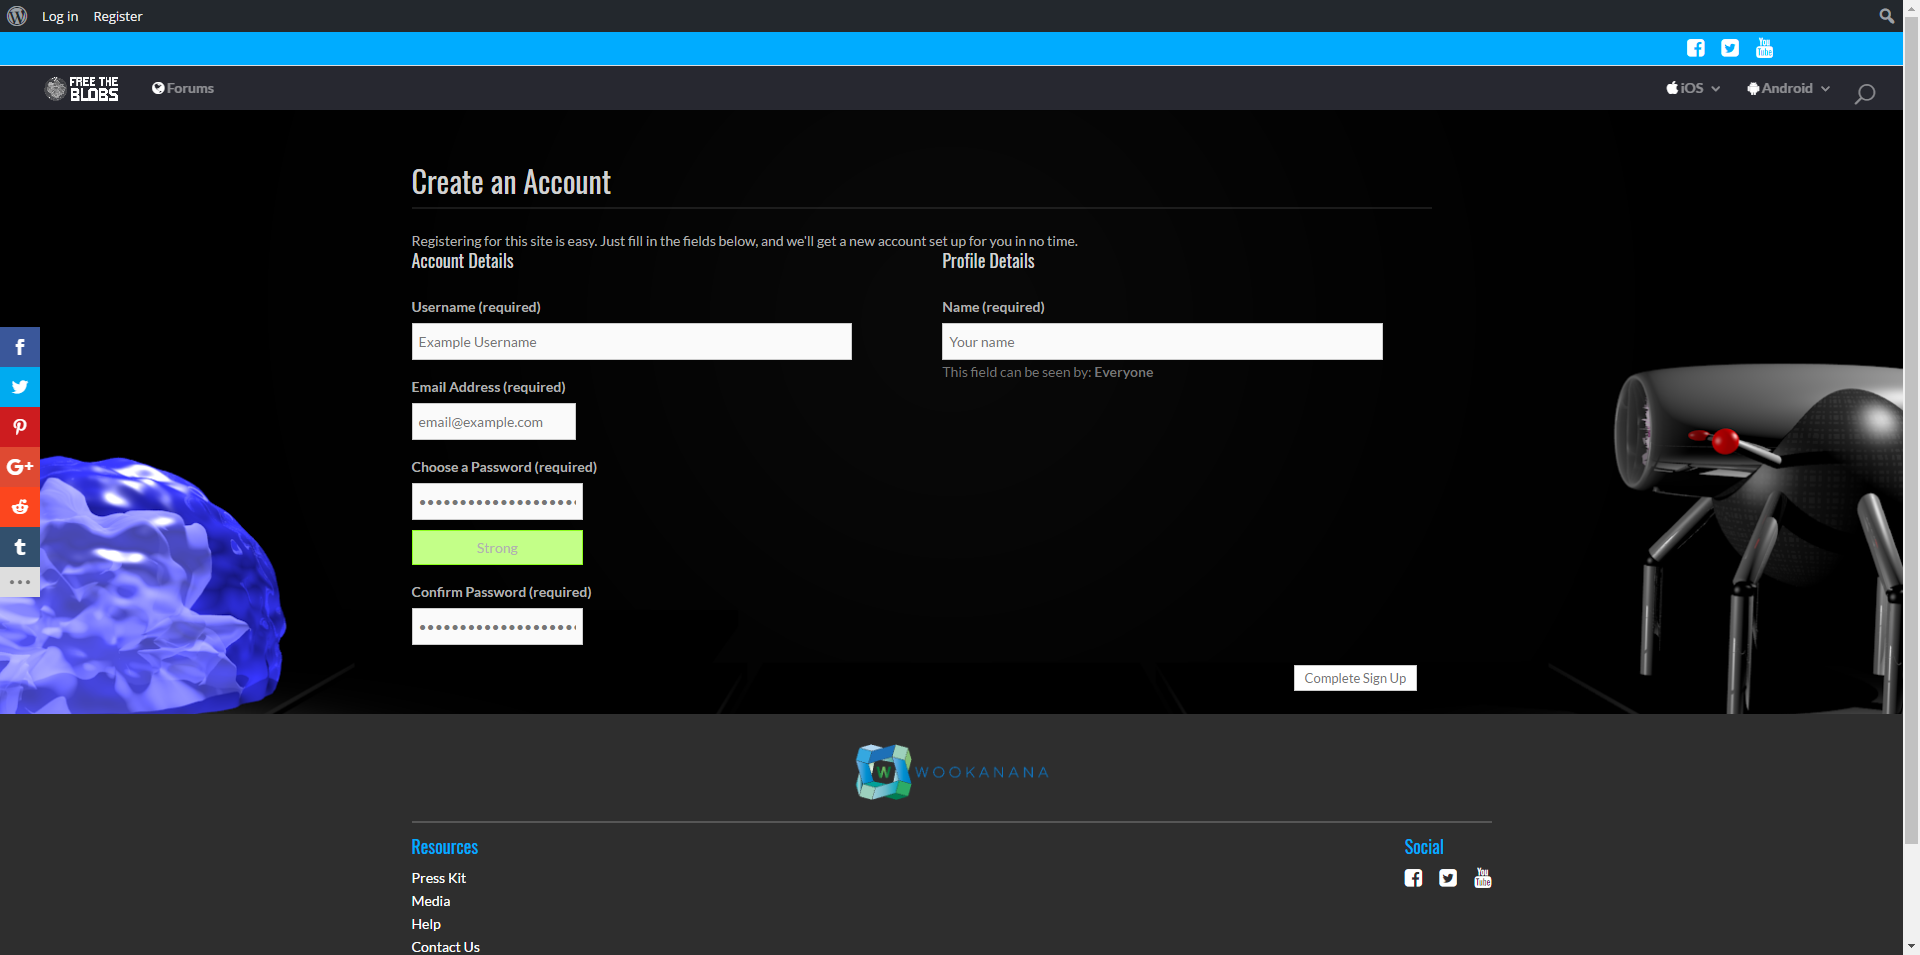
Step 1 – Create an account
If you haven’t already, you will need to create an account in order to upload files, this has been done to prevent spamming and try to keep our site smooth.
Creating an account takes just a few minutes and we only send emails that have been requested (lost passwords, file downloads etc).
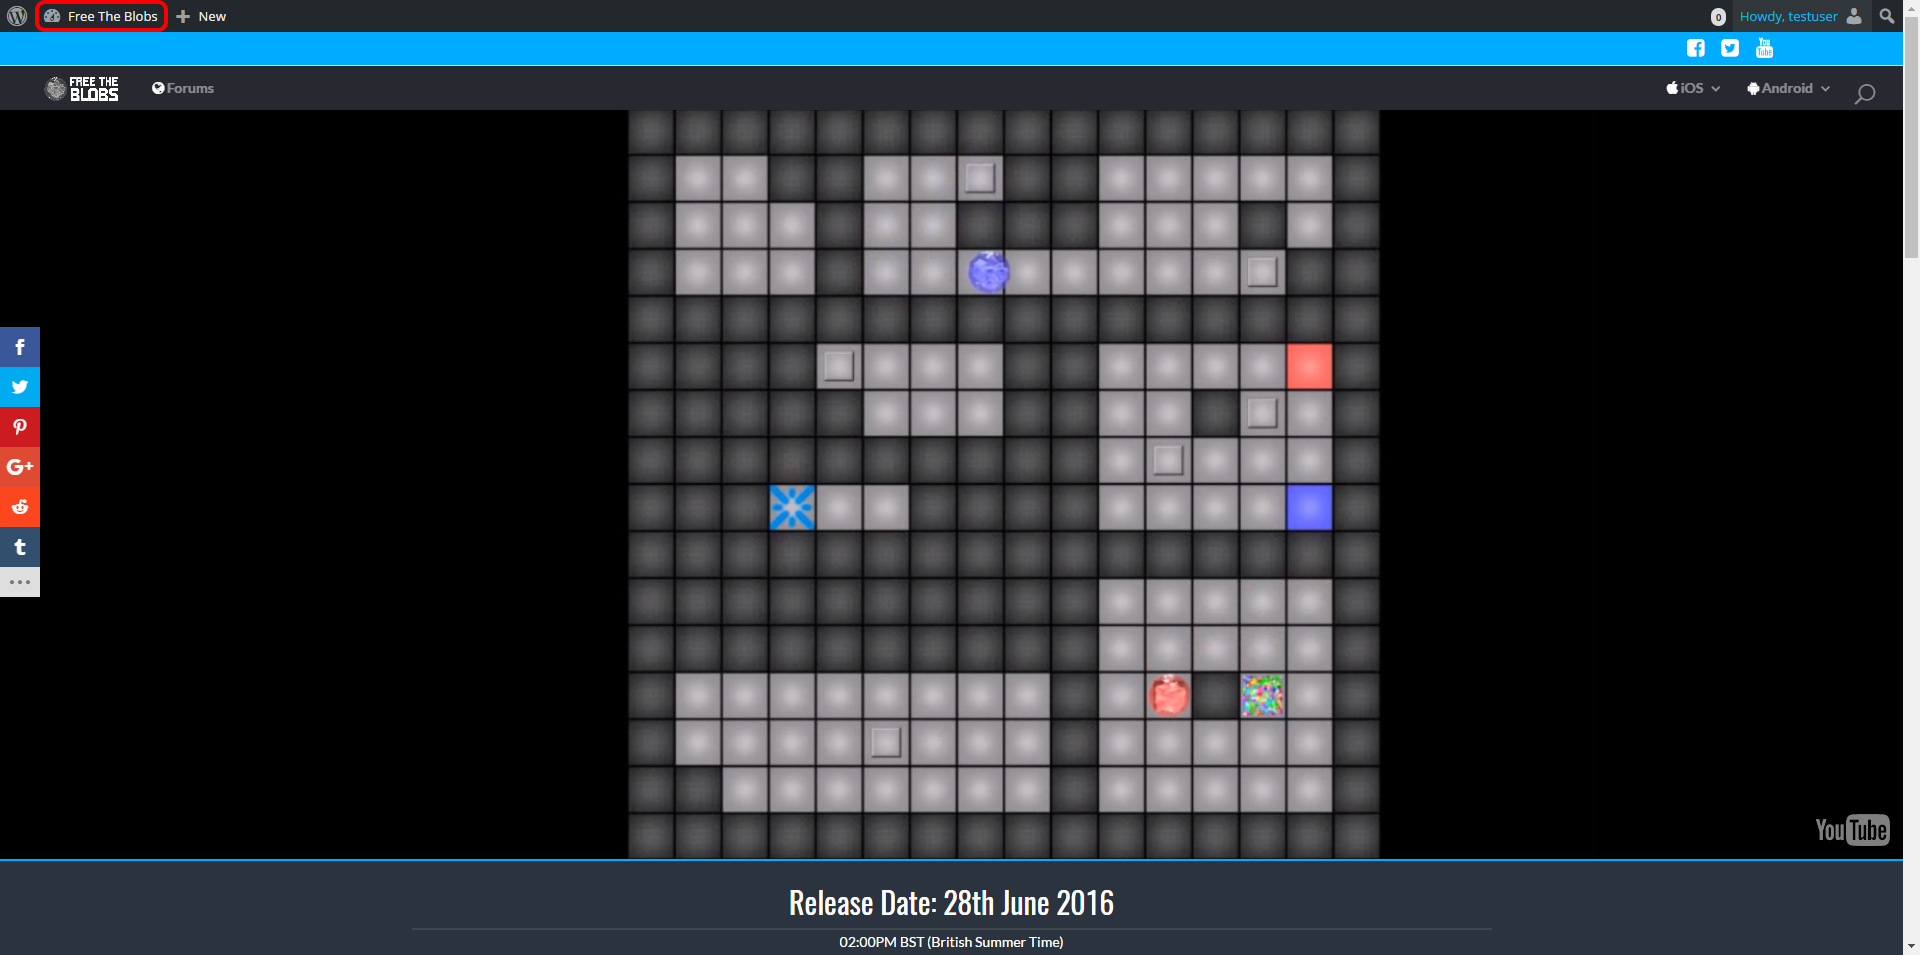
Step 2 – Accessing the Dashboard
All content handling on our site takes place on the Dashboard, a back-end editor for creating and managing content.
To access this, once logged on, click on the Free The Blobs button in the top left with the house next to it.
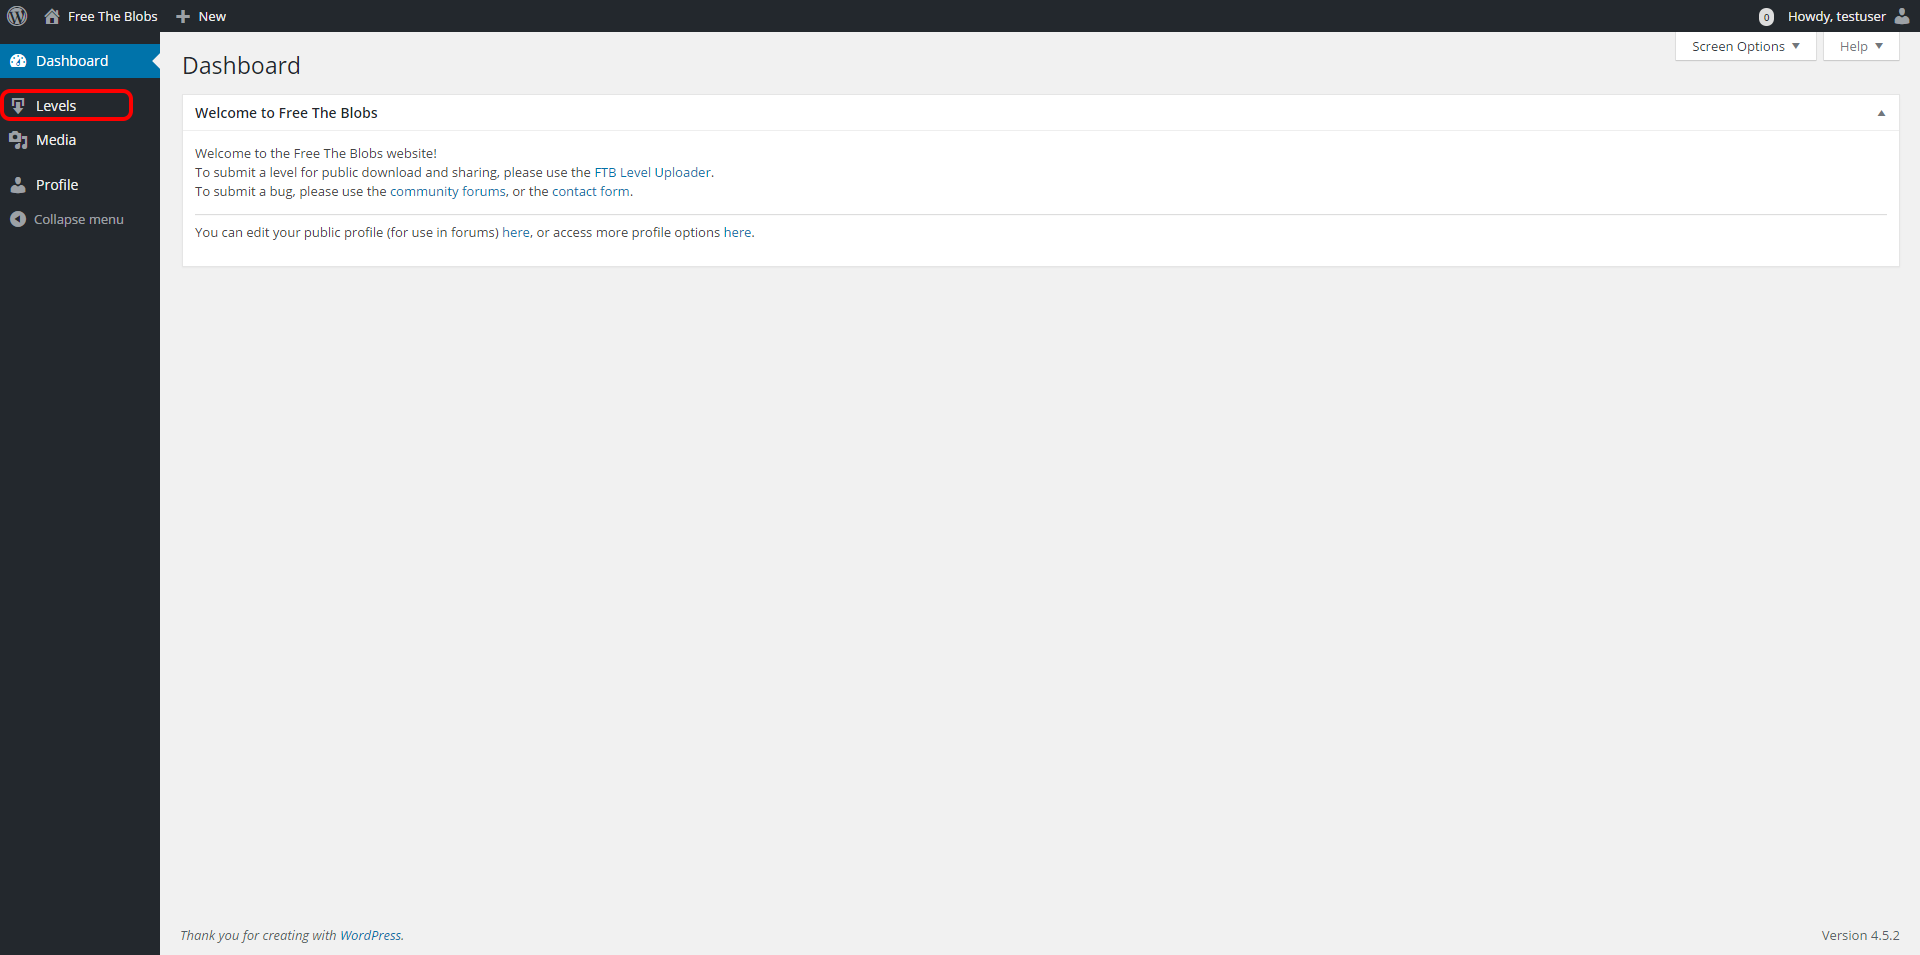
Step 3 – Navigating the Dashboard
We have supplied some useful links in the “Welcome to Free The Blobs” section in the center, but we will just be using the left menu.
Click on the Levels banner with the download icon to the left of it.
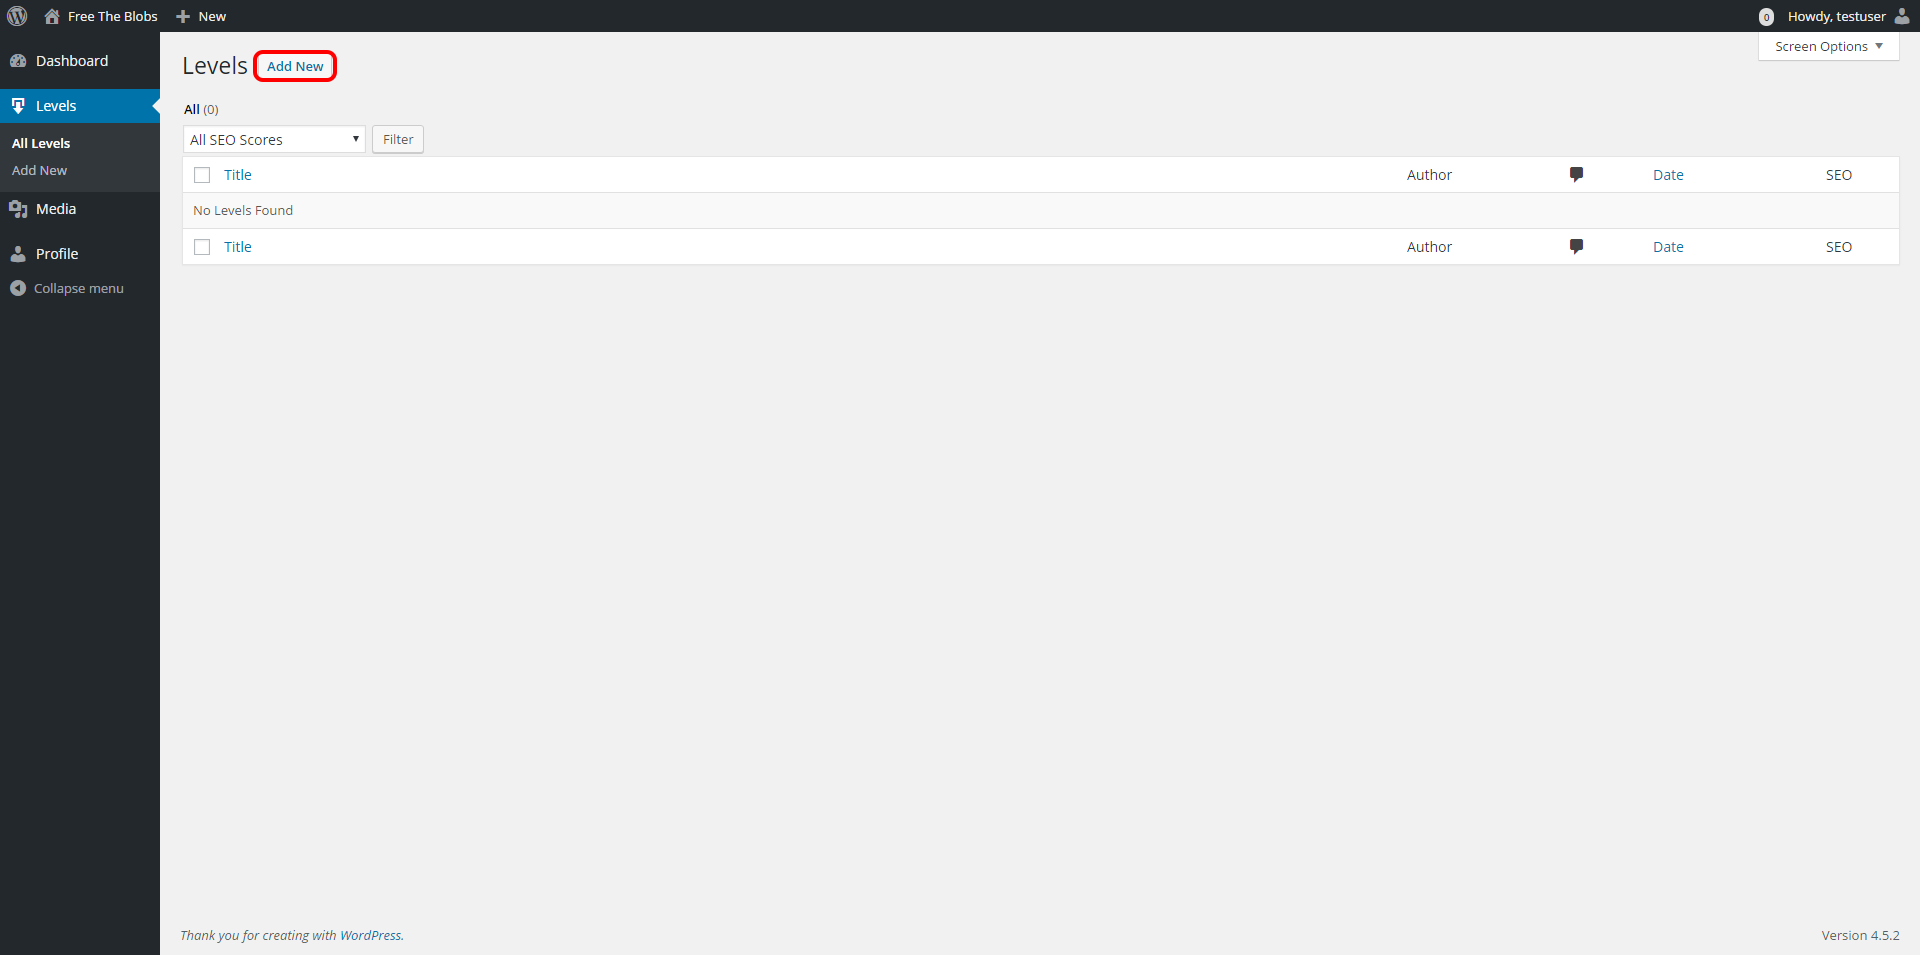
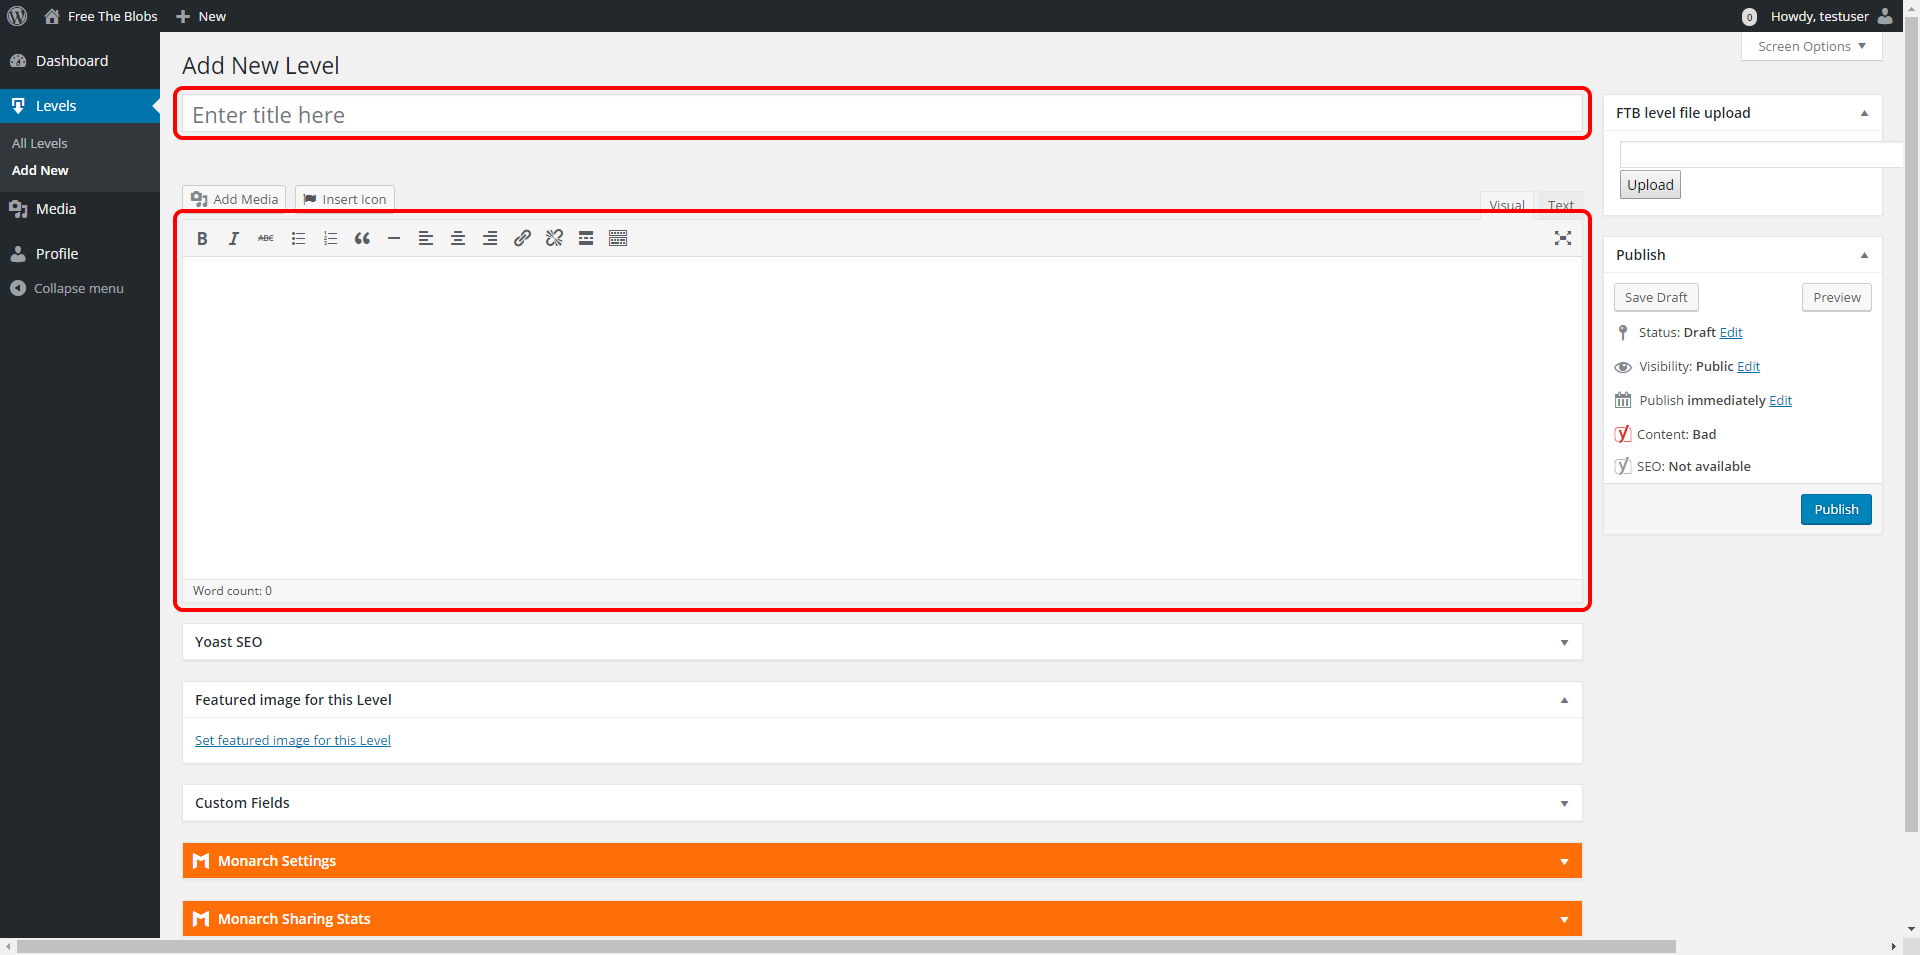
Step 4 – Adding a new Level
Once on the Levels page, you should be greeted with something like this (right), if you have posted some levels before, this will have items in.
To add a new file, click the Add New button to the right of the title.
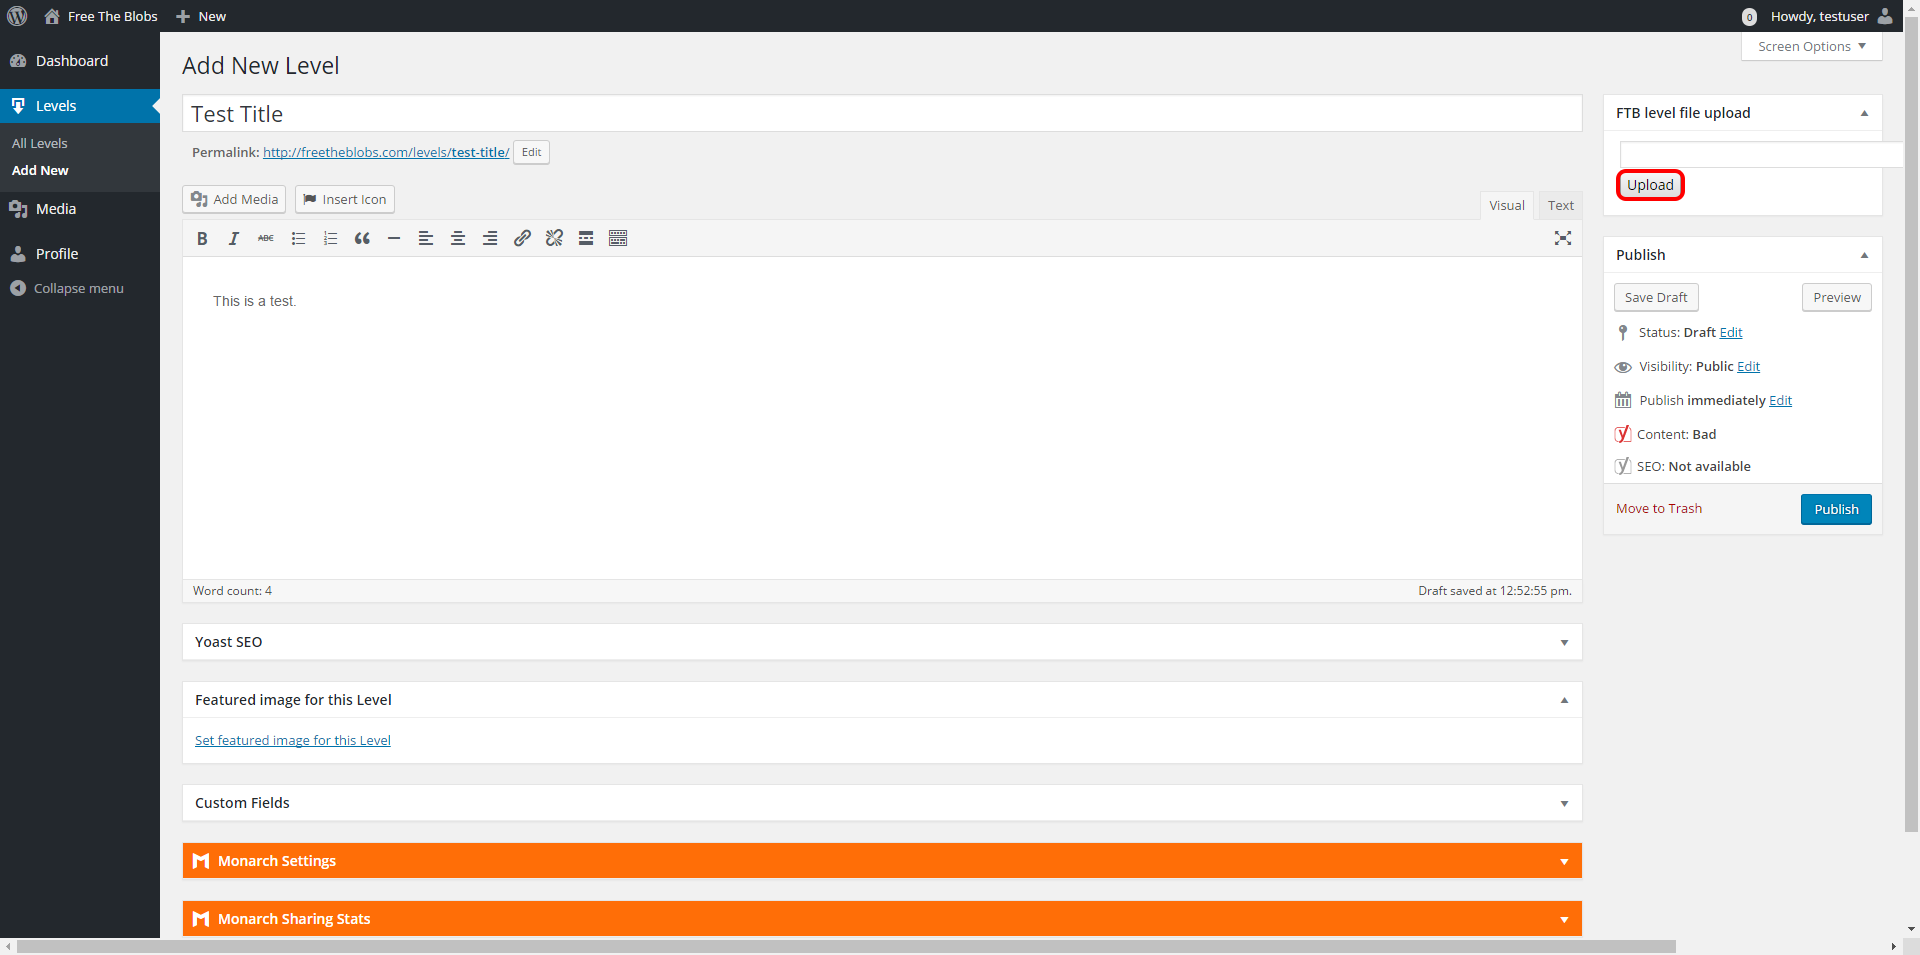
Step 5 – Filling in the information
What you put in here is up to you (within reason), our level addition system follows the same rules as our forums (read here).
We suggest this layout:
- Title – Your level name
- Content – A short description of your level, and any additional information. (Do NOT post external links in here or promote other services/companies/individuals(credit can be given for designs or modifications))
Step 6 – Uploading the file
After you have added in all the information you want to, we recommend clicking Save Draft (middle right) to prevent your work being lost.
To upload your file, click on the Upload button on the top right (this may be below the content field depending on the size of screen you are using).
Step 7 – Uploading the file (2)
After the dialog (modal window) opens, click on the Upload Files tab.
Click on the Select Files button and find your file.
Once you have clicked open (or equivalent), the file should upload.

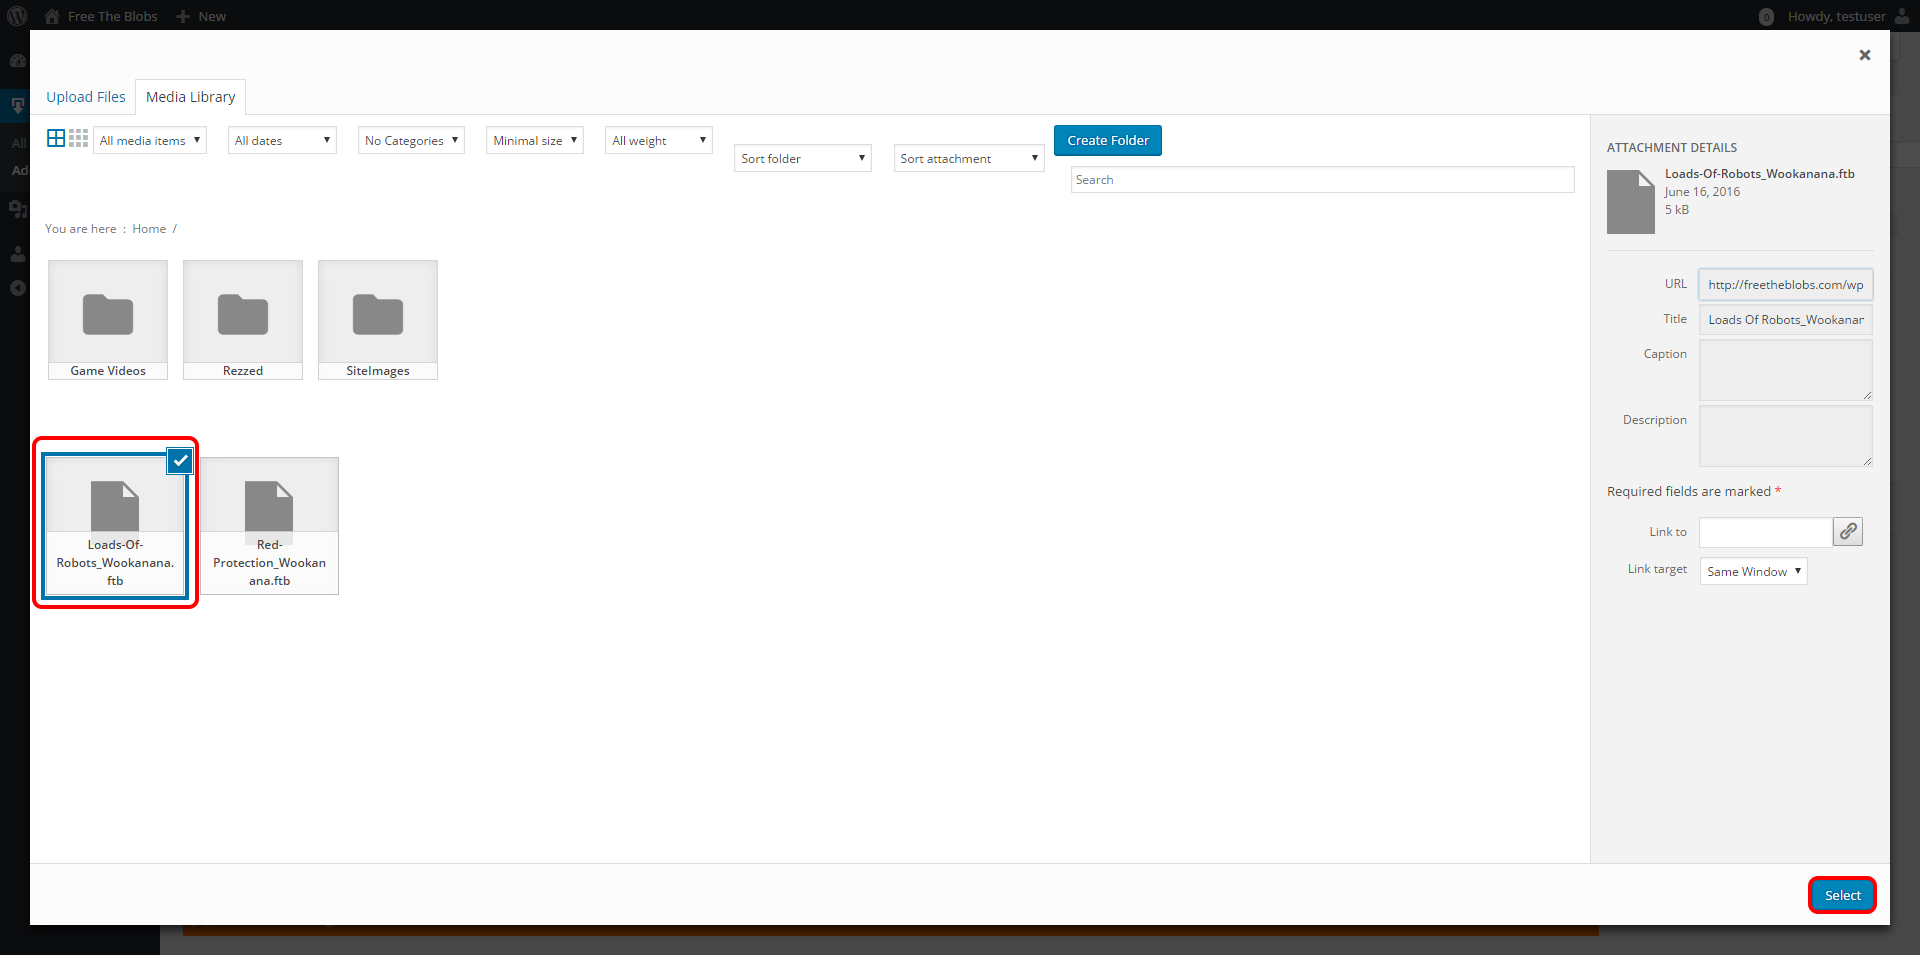
Step 8 – Attaching the file
Once you have uploaded your file, you should be able to select it in the Media Library tab.
After selecting it, and it has a tick in the top right of the file, click the blue Select button.
The FTB level file upload field should now have a path to your file in.
Step 9 – Publishing
Once you have done steps 1-9, you can click the blue Publish button (middle right).

Step 10 – Viewing
The page will refresh, and you can click either the View post banner link, or the permalink URL to view your file.


Recent Comments